Mom of Three
  • Daily Grind
  • Quilts, Crafts & Stuff
  • Links
  • Adoption
  • About

Making the Queen Elsa Costume

9/21/2014

0 Comments

 
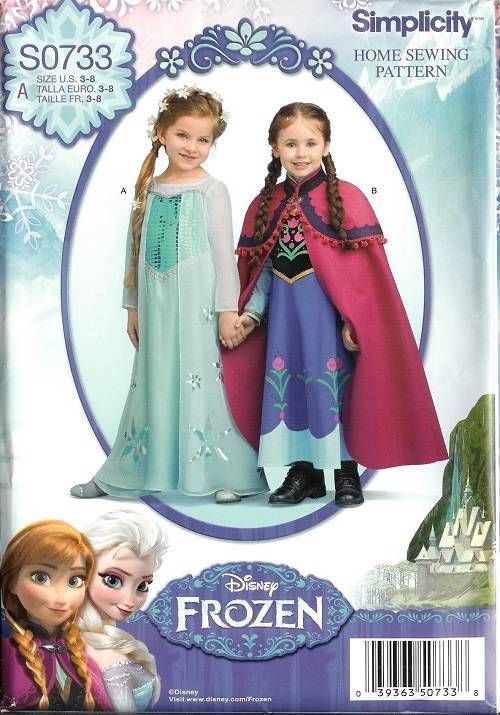
I do not know what came over me, but a few weeks ago I decided it would be a great idea to make my daughter's Halloween costume.  And, because Frozen has trapped my children in an unending blizzard of 'Let it Go' and ice castle fantasies, she wanted to be Elsa.  Queen Elsa with a wonderful, whimsical, flowy dress and cape.  

That can't be that hard, I thought to myself.  I'll just get the pattern and follow it.  It's a Simplicity pattern, I can read, and I've made some pajama pants before, so I'm sure it can't be that difficult.  Go for it, I told myself!  It'll be great practice in expanding my sewing skills. It'll be fun, I said.   

So, I bought the pattern online (it was sold out at the store), and my daughter anxiously asked every day if it had arrived.  The day finally came when it arrived in the mail, and happiness filled my daughter to the core.  We drove to pick out our fabric, and were lucky enough to get the last bit of the snowflake chiffon stuff of which some lady had just purchased 10 yards!  We left the store with the beautiful, shimmering blue satin and sequin filled fabric, and filled great anticipation and joy of what would become of the glorious fabric in our bag.  Well, at least my daughter was.  I was beginning to second guess my choice in trying to make a fancy gown with a zipper.  A ZIPPER!  What was I thinking?

It needed to start immediately.  In the event it was a complete disaster I would need time to buy a costume before they sell out because I bet about 75% of little girls will transform into Anna or Elsa this October.  I cut out the patterns and got everything ready to go.  Well, as it turns out, sewing sequins, satin and chiffon is SO NOT like quilting!  I knew that would be the case, but I just do not have the patience for it!  The chiffon could not be ironed and when I made mistakes, it was so delicate that it stretched and snagged easily.

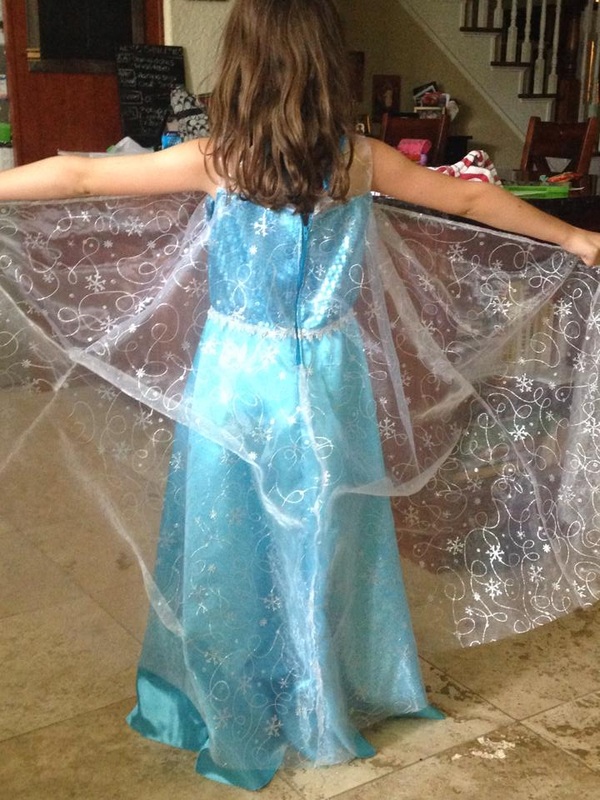
I got so fed up with trying to sew those damn chiffon sleeves on, messing up, ripping out the seams and wrecking the fabric that I gave up and now Elsa has a sleeveless gown.  Since I was sewing this for Queen Elsa of Texas, sleeves would probably be too hot.  She'll just have to deal with it.   

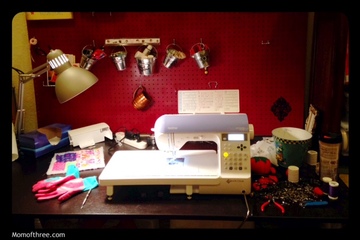
Every time I sew a pattern, I realize how much I don't know about sewing.  I don't know terms, I can't seem to figure out how the diagram shows the explanations, and so I spend A LOT of time re-reading the steps, studying the diagrams, comparing it to my garment-in-progress and wondering if I've done the whole thing backwards!  I also spend a fair amount of time searching for sewing terms and watching Youtube videos.  Thank you, Lord, for Youtube.  How did anyone ever figure anything out before there was an endless supply of instructional videos at your fingertips?  I now know what a French Seam is, and I learned how to use my zipper foot on my sewing machine.  So I guess it was all totally worth it.  Right?

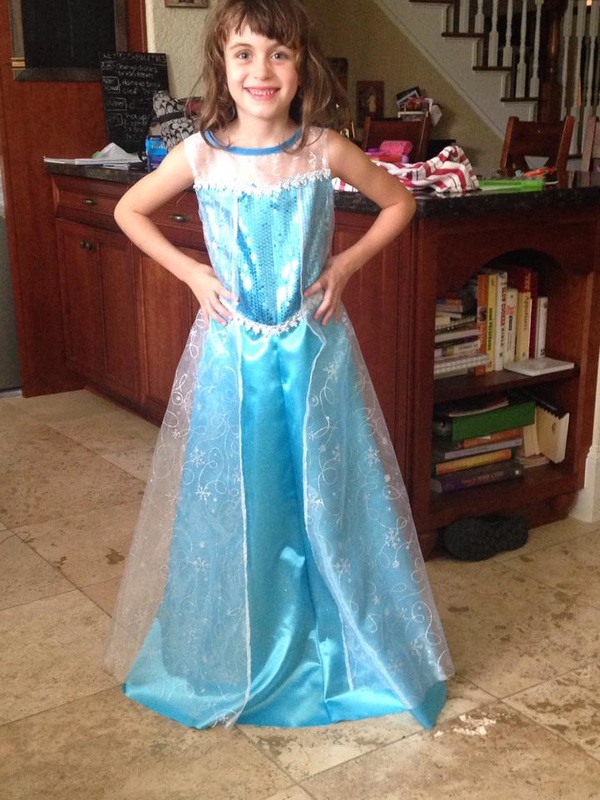
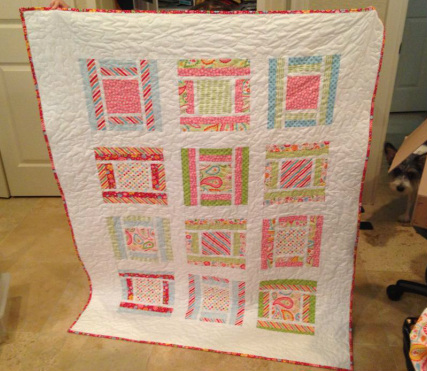
I finished the dress.  And it looks like a dress.  And the zipper is FULLY FUNCTIONAL!!  I didn't really enjoy the process of sewing the dress (I love the entire process of sewing a quilt), but I love the end product.  Just don't look too close because mistakes are plentiful, but it's just fine for a Halloween costume.  The joyful expression on my daughter's face was totally worth it all, and I'd do it again in a heartbeat (although maybe we'll pick a capeless dress next time!) :-)
The pattern. I didn't do the applique because I found great fabric.
The back.
The front. It looks like an actual dress!
0 Comments

Sweet and Sparkly

7/20/2014

0 Comments

 
Picture
Quilt front (image may not be used or reproduced without permission from momofthree.com)
Picture
Quilt back (image may not be used or reproduced without permission from momofthree.com)
This is my latest quilt that I made for my oldest daughter (middle child).  I bought a layer cake (10" squares) pack and made the 'Red Letter Day' pattern from the 'Quilts from Sweet Jane' book.  I used the same pattern for the very first quilt I made (I made a doll size with only 4 squares), and it's fairly simple and straight forward.  I used a sparkly fabric for the white, and it adds the perfect amount of little girl flair!

This was the largest quilt I've made so far, and managing all that quilt in my machine while doing the actual quilting was challenging.  I never realized how physical quilting is, and so I need to figure out how to manage all that fabric in the machine better.  I quilted it with a simple free-motion stipple pattern because I haven't learned to do anything else yet!  But, it looks really cute.  

Anyway, the quilt turned out really great, and I'm proud of it.  As you can see, I used my daughter to hold the quilt up (she's 7), so it's the perfect size for her.  My quilt room is a work in progress, and one thing I need to work on is a good place/way to take better photos.  

My quilting confidence is getting better, and in August I'll start working on more quilts as well as organizing my space.  I'd love to see what your spaces look like so share a photo or tip for making a great quilt space!
0 Comments

Why Quilting is Awesome and How to Get Started

4/5/2014

0 Comments

 
Picture
For many years I wanted to learn how to make quilts, but I didn't have a sewing machine.  I was also very intimidated because it seemed so difficult.  

I got my first sewing machine a few years ago and started re-learning how to sew.  I made some simple pajama bottoms and things, but I still wanted to learn how to quilt.  So, I went to a quilt show hoping to learn something, but it was a bit overwhelming.  I didn't really know anything, but I bought a pattern that seemed simple and thought I'd figure it out.  I made the quilt top, but then it took me several more months to get brave enough to figure out how to do the actual quilting.  But, in the end, all it takes is a little determination, some equipment and time to watch a few youtube videos!  

I love quilting because as a busy stay at home Mom, it's something that can be worked on in short spurts if you need to.  It's easy to cut fabric or sew for 30 minutes (or even less!) if that's all the time you have at any given moment, and then it can easily be picked up again the next time you have some free moments. And, in the end you have something really wonderful and special to give to someone.  You can make other things, too, like purses, wall hangings, placemats, or whatever your heart desires.  Here are my suggestions on how to get started.

1.  You need a sewing machine, and you need to know how to use it.  Classes are often offered at craft stores or sewing machine stores.  My first machine was a very simple one my Mom me bought me at Wal-Mart for Christmas one year.  I took a class to learn the basics, and then my 7th grade memory kicked in.  But, when I started actually quilting, it didn't work so I upgraded to a nicer machine and classes are offered at that store to learn the machine.  I haven't been able to take one yet, but I got a quick overview when I made the purchase.  Also, the user's manual has been helpful!  You can hand quilt, but I don't know anything about that, so youtube videos and books may be your best friend!

2.  Supplies: You'll need some basic supplies like a rotary cutter to cut fabric, a cutting mat so you don't damage your table, some quilting rulers so you cut straight and an iron.  It's important to iron fabric so the fabric is cut straight.  Seams also need to be ironed flat.  You can pick up other supplies for quilting and cutting as you learn.  It's very addictive, and amazon is a great way to avoid a trip to the store if you know exactly what you need.  

3.  Books:  I think books are a necessity.  I like to look at pictures, color combinations and ideas.  It's also nice to have a few reference books for when you aren't sure what a word means or if you need a quick reminder on how to do something.  I'll link to a few of my favorites below.  

4.  Youtube videos:  If you can't take classes for whatever reason, youtube videos are great!  I learned how to bind my quilts via youtube, and it's really helpful to watch a demonstration of exactly what you need at that moment.  I've been quilting and stopped to watch videos in the middle to make sure I'm doing things correctly.  Missouri Star Quilt Co. has an amazing tutorial collection online as well as a fabulous website.  Start searching and you'll find many great resources.

5.  Fabric:  It's easy to lose yourself in fabric.  There are so many beautiful fabrics and possibilities!  I like to buy precut fabric packs and then use a pattern that is made for pre-cuts.  There's a great book I'll link to below that uses precut fabrics for quilts.  I think it's a great way to start because it's a little less intimidating.  Plus, you know all the fabrics match when you buy precuts.  You can then buy several yards from the same fabric line for the backing.  And, it's very simple to shop from home from any online fabric shop!  There aren't nearly as many options in the local shops around where I live.  

6.  Desire:  If you want to do it, you can do it!  It's not as hard as it seems!  I can barely do the simplest free-motion quilt pattern, but the more I practice the better I'll get - at least that's my hope!  It's also really fun to attend a quilt show or join a guild.  Guilds offer many interesting workshops and classes.  Plus it's a great way to meet people and see lots of quilt styles!  There's probably one in your area or close by, so just google it!

If you're a quilter, I'd love to see a photo of your favorite (or first!) quilt you've made!  Also, I will post some links to my favorite quilting books that I have and use frequently.  I highly recommend them as great references in your library!

My first quilt - a doll sized practice quilt from Quilts From Sweet Jane. I made a million mistakes, but my daughter loves it for her dolls!
My first real actual quilt from the pattern I bought at the quilt show. I made less mistakes and gave it to my youngest daughter.
Disclaimer - I do make a small amount of money from Amazon from products purchased on my blog.  I only put products on that I have personally used and would recommend to friends and family.  If you're considering purchasing the above product, I'd love if buy from the above link!  Thanks!
0 Comments

Finished Quilt top - Post-finger impalement

3/11/2014

0 Comments

 
Picture
I got back on the sewing machine 2 weeks after my finger-sewing incident.  I was sewing the outer white sashing when I sewed myself, so I finished that and added the border.  I wasn't going to finish it, but since it now has such a great story to go with it, I think I'm going to finish it and keep it for myself.  

I love the pattern, but in the end, I think it's too busy.  Maybe I should have used less variety of fabrics, but it's growing on me a little, too.  

I certainly learned a lot with this quilt such as making sure you cut your fabric in the correct direction so the pieces line up nicely together.  I also learned that I'm not great at points yet, and they are tricky!  If you don't look too closely you can't see all my mistakes :-)  I'd like to try to make this same pattern in a red/white/black Nebraska Cornhusker theme, but I have a few other things I'm working on first.  

This is also the largest quilt I've made so far, so after spring break I will tackle putting the back together and quilting it.  I'm a little nervous about that, so maybe I'll just quilt straight lines.  We'll see!  I'll post the final product when I'm done!

0 Comments

Easy Sun Dress

2/19/2014

0 Comments

 
Picture
I seek out easy sewing projects, especially when it comes to clothes.  I can make easy clothes with a pattern, and I am probably capable of making more complicated stuff, but it's not something that really interests me at this point.  I'd rather be quilting, honestly.  Anyway, I do like to make cute things for my kids if I can, and this dress is probably the easiest it gets.  

If you have a sewing machine and can sew a mostly straight line, you can do this.  

This fabric (and others like it) comes pre-made by the yard. The top is pre-smocked, so all you have to do is measure the chest width of your child, cut it, and sew a seam down the back.  You could leave it strapless for a cute swimsuit cover up, or pick out some cute ribbon and sew straps.  Just measure on your daughter and pin them where they belong and sew.  It's literally the easiest thing I've ever made.  Finishing something that is wearable, no matter how easy, is quite satisfying as well!

You can get the fabric and ribbon at Hobby Lobby with a coupon (make sure you have the app) or when it's on sale, which is often.  They sell it at other fabric stores as well.  Happy dress making! 

My daughter, above, wore this to school today with leggings and a little tank top underneath.  

0 Comments

Easy Baseball Cake

2/15/2014

0 Comments

 
Picture
Cakes are like the jewelry of the party.  I love having a really cute cake, and most of the time I buy them.  But, this year for my son's birthday I thought it would be fun to make a baseball cake.  It wasn't as hard as I anticipated either!  

I got Wilton's ball cake pan and followed the directions using a regular cake mix from the store.  I like to make my own frosting, but I was low on time so I just bought store frosting.  The great thing about this cake pan is that it comes with directions on how to make many different sport balls - soccer, bowling, basketball, etc. so it's pretty versatile.  I have a football pan that I do the same thing during football season!

It didn't take long to decorate using decorating tips.  I bought this set a long time ago and used the #18 tip for the baseball.  I used red decorating gel with one of the small tips for the red piping.  

I frosted the cupcakes and added the shirts that I picked up at a party store.  I stuck everything in a cake box I also purchased at the party store, and WA-LAH, a great looking cake!

The baseball was classic yellow cake, and I made the cupcakes chocolate to give the kids a little choice.  It was a big hit, and everyone loved it!  Someone even asked where I bought the cake, and so I felt it was successful!    
0 Comments

Beginning Quilting with Precuts

2/13/2014

0 Comments

 
I've started quilting, and I just love it!  I've only made 2 so far, but I'm working on my third one, which I hope to finish by the end of the month, maybe sooner if I can get enough time in one sitting to really work on it.  I've discovered a great book using pre-cut fabrics to make quilts - Quilts from Sweet Jane and it seems like a great place to start.  The quilts are super cute, and the instructions are pretty easy.  If  you need even more help beginning, I recommend The Quilting Bible, which is a great reference for terminology.  It contains great photos, and has really helped me!  I'm currently working on the Greek cross quilt from Quilts from Sweet Jane, and I'll share photos when it's finished! 
Precut fabric packs are great for beginner quilters.  As a beginner myself, I find the task of picking numerous complimentary fabrics daunting, not to mention very time consuming.  I've bought a few layer cakes and fat quarter bundles to get me going on my first few quilts, so all I have to worry about is choosing which pattern I'm going to use!  The fabrics are all complimentary, so you don't have to worry about picking fabrics that look good together.  There are jelly rolls (strips of fabric), charm packs (5" square packs), layer cakes (10" square packs), and fat quarter packs.  Precuts make cutting easy, and in some cases you don't even need to cut, and they are easy to pick out.  Fabric stores carry them, and you can find great ones online.   

Here's a preview of what I'm working on from the Sweet Jane book.  I've been trying to organize my blocks so I can start piecing them together.  The prints are a little wild, and if I did it again I would maybe tone it down, but we'll see what happens when it's all put together!
Picture


Happy Quilting, Y'all!

0 Comments

Easy Valentine Party Idea

2/12/2014

0 Comments

 
Picture
Valentine's Day is Friday and that means school parties are coming up.  I'm participating in my son's party this year and I was assigned to do the photo booth.  We are going to take each child's picture at the photo booth, print the photos and then put them in a frame made by the kids at the party.  

Making the background was super easy.  I got a tri-fold presentation board, covered it with some valentine wrapping paper and added some letters.  I think I would prefer the letters to be a bit bigger, but I'll have a better camera when taking the photos.  We also got several props - silly glasses, feather boas, hats, etc. for the kids to put on for the photo.  I think a simple background is best since the kids will have the props for the photos.  And, what a fun keepsake to give to Mom and Dad!  I'll post an update after the part


0 Comments

DIY Flip Flops

2/12/2014

0 Comments

 
Picture
I have many spools of ribbon sitting around waiting to be used.  And, as I wandered through Hobby Lobby the other day I walked past the flip flops and I realized it would be pretty fun to make some flip flops for the girls.  And, it turns out it was pretty easy with all the right tools.  Add a bow, some sparkle and you have some cute flip flops.  I once bought my daughter some super cheap flip flops at walmart, and her foot grew out of it before they wore out.  I was very surprised since they were so cheap, and these seem much better quality than those.  My daughter has already worn them despite the 38 degree temps we've had this week.  More to come!

0 Comments

    Author

    Write something about yourself. No need to be fancy, just an overview.

    Archives

    September 2014
    July 2014
    April 2014
    March 2014
    February 2014

    Categories

    All
    Quilting

    RSS Feed

Powered by Create your own unique website with customizable templates.